In vPlan you can ensure that users can only see tickets that are intended for them. This can be very useful when you are hiring external resources or freelancers.
For a user to be able to see his/her tickets, your vPlan environment must meet the following conditions.
1. The user must also be a resource in vPlan. (What is the difference? Read it on: What's the difference between users and resources?)
2. The resource must be linked to the user in the user account.
The best way to explain this is with an example.
You are an installation company that, in addition to your employees, also hires freelancers to perform work for customers. You would rather not have the freelancers see each other's planning. Check and follow the next steps in your setup.
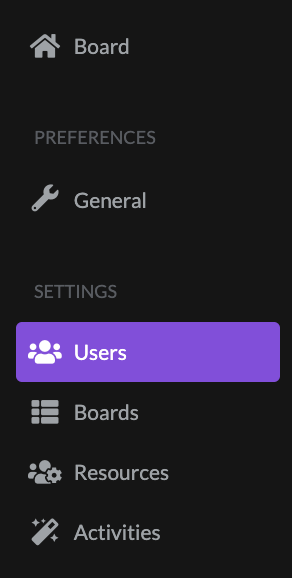
1. Ensure that the user is linked to the resource. To do this, go to Settings in the left-hand menu bar of vPlan.
2. Then click Users.
A list of user accounts is now displayed.
3. Open the user you want to link to a resource by clicking on his/her name and then click on Edit in the upper right of vPlan.
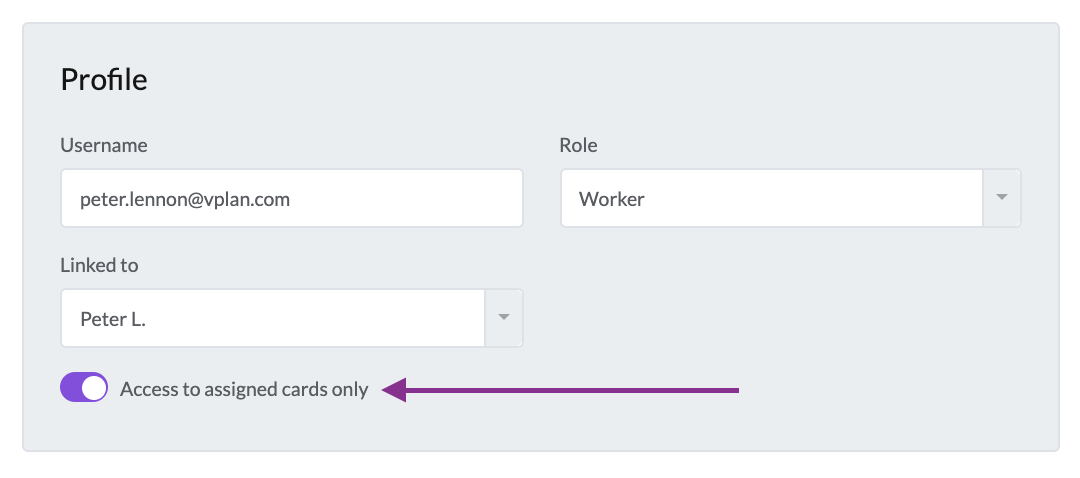
4. In the edit screen of the user, make sure that he/she is linked to the corresponding resource:
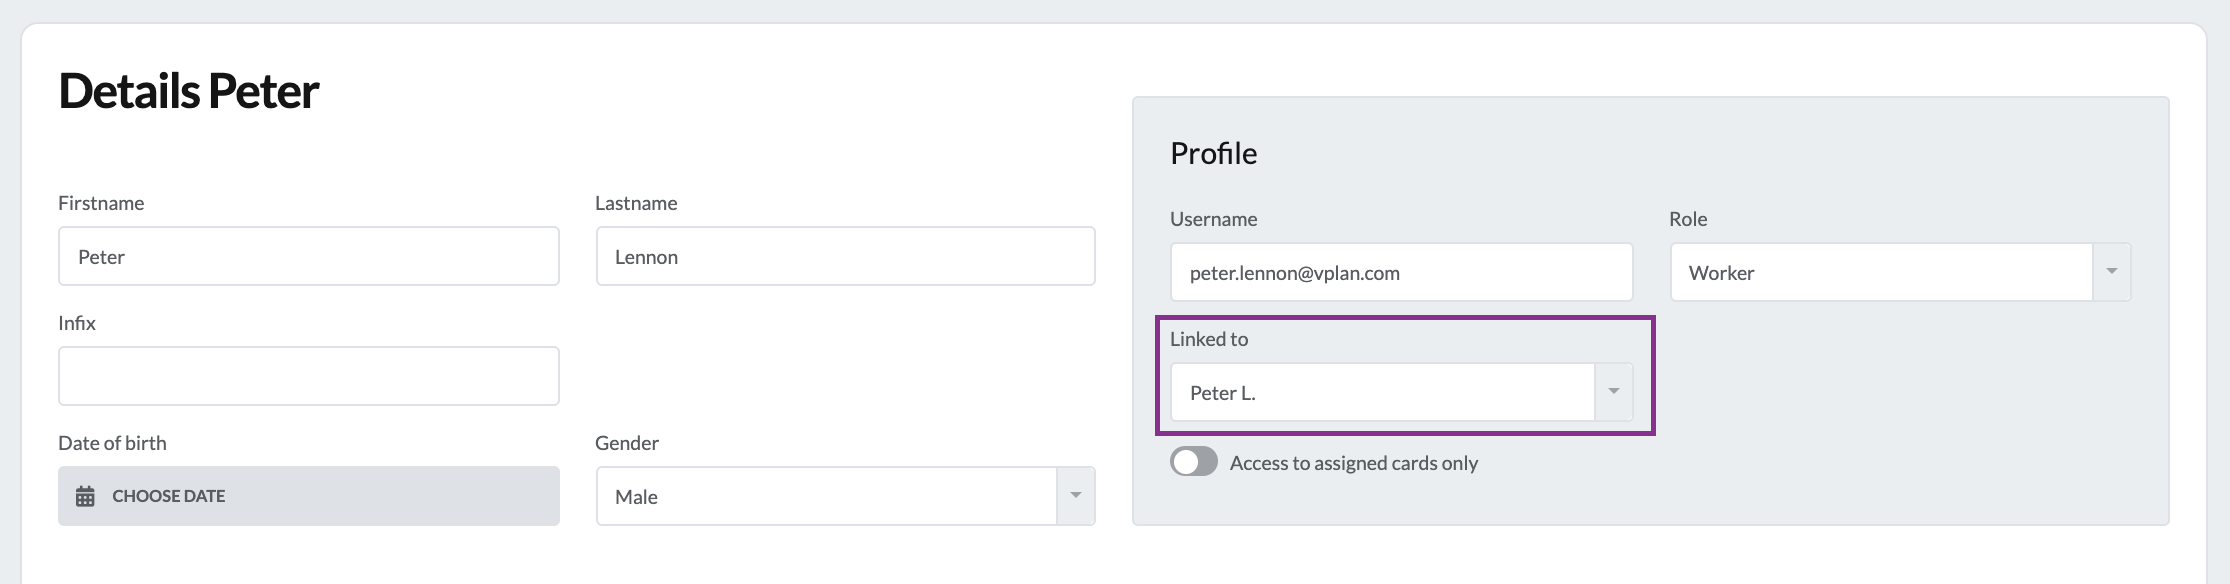
vPlan now knows that the user Peter Lennon is also the resource Peter L.
5. Finally, click on ''Access to assigned tickets only'' to ensure that the user only sees tickets assigned to the resource Peter L.