With these automations, you can ensure that a card is automatically locked as soon as you plan it from the backlog, or create a new card on your board.
Locking cards is a way of securing your planning and making sure that no other users can change it.
If you work with stages, you can also use card locking to ensure that the process takes place in the right order by using status-based automations to unlock a card when the previous card is completed.
Useful:
For more information on locking and unlocking cards, go to Locking and unlocking cards
More information on setting up automations can be found at How automations work
In this article we will look at automating the lock/unlock feature.
In vPlan, you can lock or unlock plan cards automatically when you plan a card, or on the basis of status changes. With the combination of both automations you can make sure that plans are not changed anymore, and that the cards are processed in sequence.
1. Automatically unlock/lock cards based on planning.
2. Automatically unlock/lock cards based on status change.
3. How can you combine these automations?
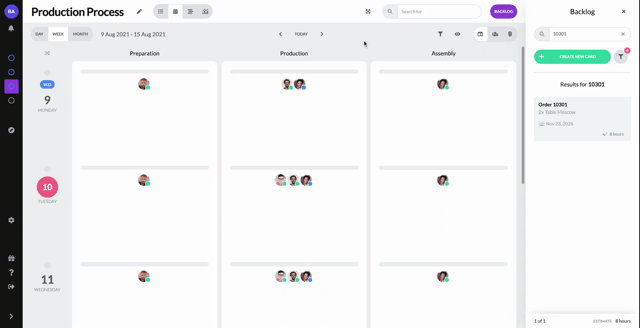
1. Automatically unlock/lock cards based on planning.
The (bold) parameters you can set are:
Stage: Choose at which phase the automation is triggered, when you plan or create a card on that phase (trigger).
Lock/Unlock: Choose whether you want the automation to lock or unlock the card (action).
Stage (2): Choose in which phase(s) the automation should perform the lock/unlock action (where).
An example you can set:
The automation in this example will cause all cards to be locked immediately after scheduling.
A common variation of this automation is to automatically lock all cards except the one in the first stage. This can be combined very well with the automation to lock and unlock other cards based on status (explained below).
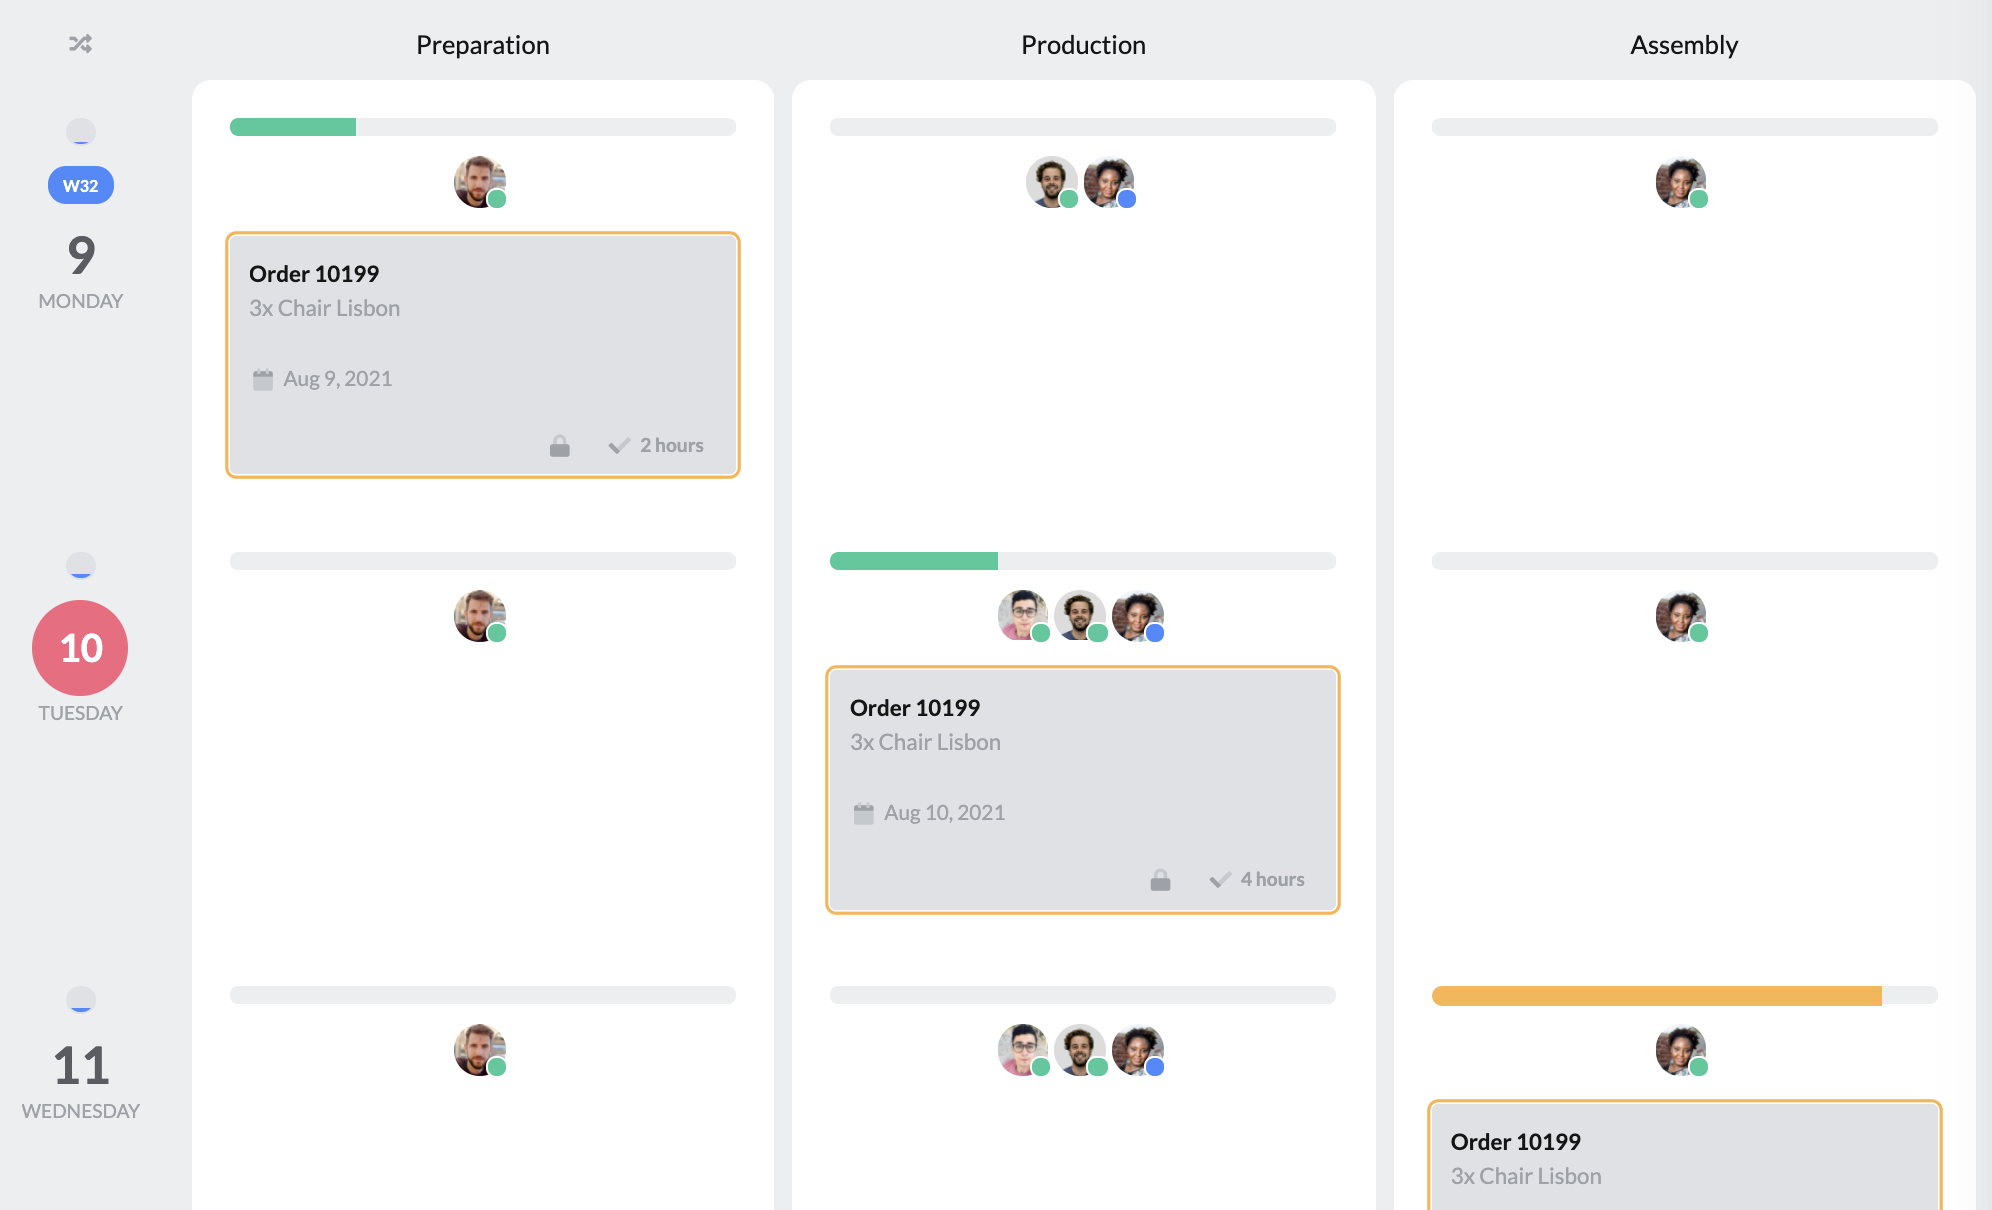
2. Automatically unlock/lock cards based on status change.
The bold text in the automation are parameters that you can set according to your own vPlan settings:
Stage: Choose in which stage of your planning board the automation is triggered.
Status: Choose at which status change the automation will be triggered.
Lock/unlock: Choose whether the automation should lock or unlock (action).
Stage (2): In the second choice of stage, choose at which stage the automation should lock/unlock a card (where).
An example of the automation you can set up:

This example ensures that you automatically unlock the card in production when the card is completed in the Preparation stage.
Extra tip: You can ensure that the previous card is automatically locked when the second card is started. You can then set the following (example) combination:

This combination ensures that even finished cards are automatically locked again. Repeat this combination as you use more stages in your plan board.
3. How can you combine these automations?
Imagine a process in which preparation, production and assembly are planned. You want the planning to be done as much as possible in a fixed order, without the possibility of changing the planning or the order of planning.
You can then combine the two automations as follows.
Firstly, you can choose to lock the cards when planning. This can be done manually, or you can set up this automation:

You can also choose to lock the card in the first stage, but note that the user who must complete the first card cannot do so while the card is locked. So you will have to unlock the card manually in the first stage to be able to start.
Then you set the automation that unlocks the card in the next stage, as soon as the card is completed in the first stage.

Do you even want to go so far as to re-lock the completed card in the first stage as soon as you start on the next card? Then set this automation:

The combination of automations looks like this in the configuration of your board:
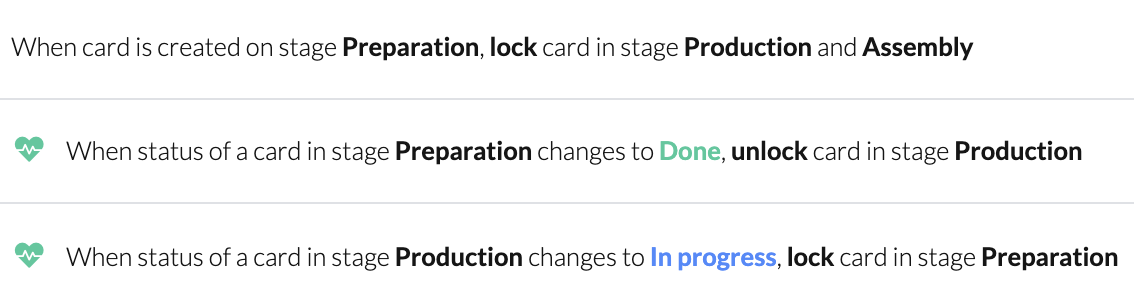
Repeat the bottom two automations when using more than two stages.
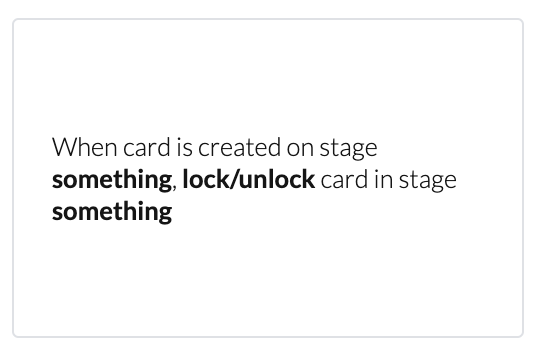
In the example below, we give you an impression of what this automation combination looks like in practice: